

Product images are for informational purposes only and may vary slightly depending on the batch and supplier. Product specifications and prices may be subject to change without notice. We do our best to provide accurate and complete product specifications, but they may not be completely accurate. If you encounter any such situation, please let us know.
The product is intended for specialists and requires qualified and authorized personnel. The product does not include assembly/use instructions . Putting the product into operation by unqualified persons leads to the loss of the warranty according to the Terms and Conditions on the site.
The specified technical parameters (current, power, etc.) represent maximum allowable values under ideal operating conditions. For safe use and optimal lifespan, it is recommended to operate the product continuously at no more than 50% of the specified maximum values.
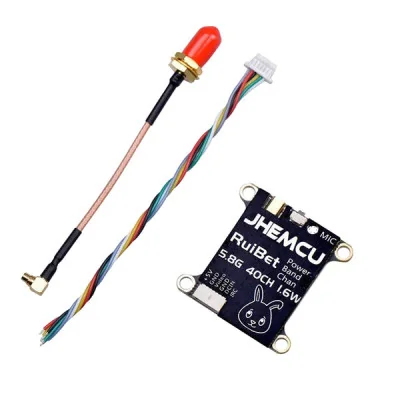
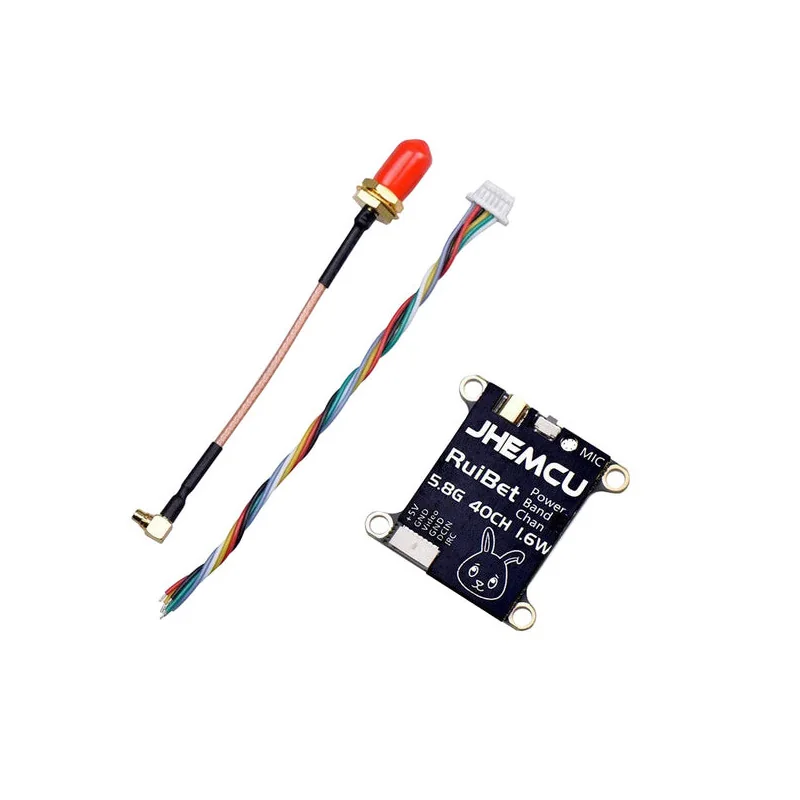
VTX JHEMCU RuiBet Tran-3016W, 5.8G 40CH, 1.6W, integrated microphone, 7-26V
Analog 5.8 GHz video transmitter for FPV drones and radio-controlled models, with adjustable power from 25 to 1600 mW and 40 channels in 5 bands. It has an integrated microphone, is powered directly from 2S - 6S LiPo (7 - 26 V) and provides a 5 V output for the camera. It is adjusted from the button and LEDs or via IRC from the OSD.
Buying this product earns you 15.97 RON in loyalty points.

International fast shipping within EU. Free Shipping for orders above 100 EUR in most EU countries.

We ship from our stock within 24H

You earn points with every order, worth 5%.
The VTX JHEMCU RuiBet Tran-3016W transmits the analog video image from the FPV camera on the 5.8 GHz band, with adjustable output power of up to 1.6 W and 40 channels grouped in 5 bands. It has an integrated microphone for transmitting sound together with the image and is powered directly from the LiPo battery. It is suitable for freestyle and long range FPV drones, airplanes and other radio-controlled models that use goggles or analog receivers of 5.8 GHz.
The video transmitter works in the 5645 - 5945 MHz range, with bands A, B, E, F and R, 8 channels each. The output power has the levels PIT, 25, 200, 400, 800 and 1600 mW, and at first power-up it transmits on 5733 MHz (B1) at 1.6 W. The band, channel and power are changed with the button on the board, following the three LEDs, or from the OSD menu of the flight controller via the IRC protocol. The input voltage is 7 - 26 V, that is LiPo batteries from 2S to 6S, and the board provides a 5 V output at a maximum of 1 A for powering the camera.
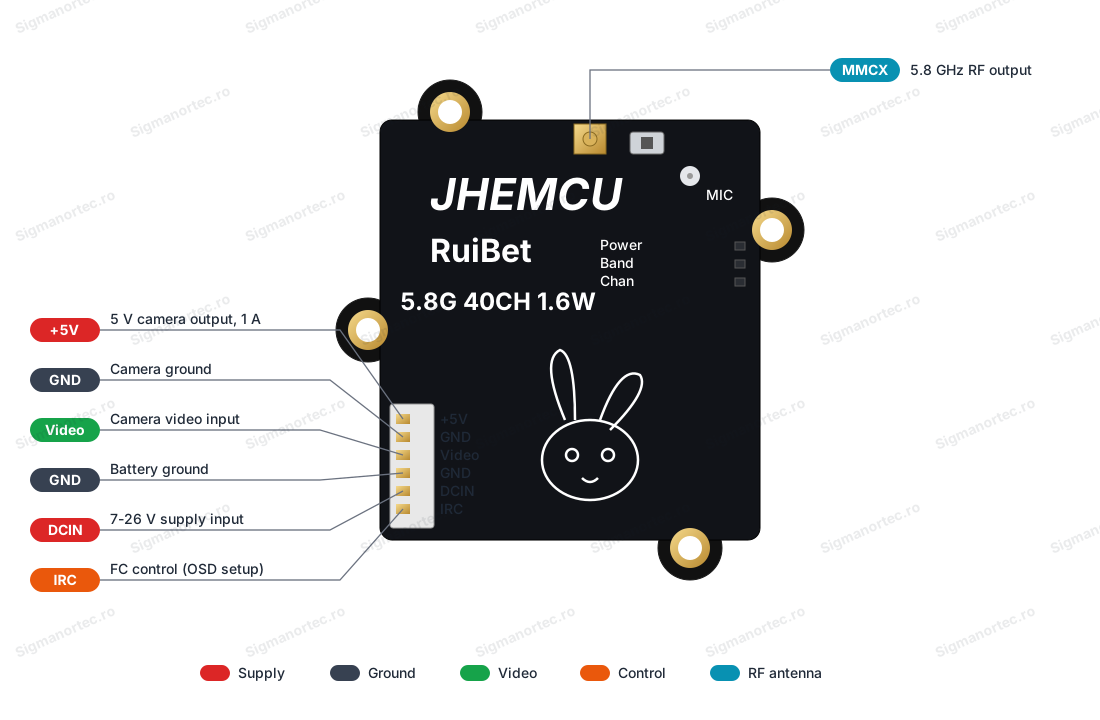
The main features include the MMCX antenna connector, the configuration button, three LEDs marked Power, Band and Chan, the MIC microphone, the 6-pin 1.0 mm connector with the signals +5V, GND, Video, GND, DCIN and IRC, and four M3 mounting holes at 30.5 x 30.5 mm. Power is supplied at 7 - 26 VDC through the DCIN pin.
The module connects to any analog FPV camera with composite video output, to flight controllers with IRC output and to goggles or analog receivers that operate on the frequencies of bands A, B, E, F and R.
Specifications:
Power supply: 7 - 26 VDC (2 - 6S LiPo, DCIN pin)
Maximum 5V output current: 1 A
Type: Analog 5.8 GHz VTX
Frequency: 5645 - 5945 MHz
Channels: 40 (5 bands x 8 channels)
Bands: A, B, E, F, R
Output power: PIT / 25 / 200 / 400 / 800 / 1600 mW
Default output: 5733 MHz at 1.6 W
Audio: Integrated microphone (MIC)
Control: Button, 3 LEDs, IRC
Signal and power connector: 6 pins 1.0 mm
Antenna connector: MMCX
Mounting holes: 30.5 x 30.5 mm, M3
Weight: 7.3 g
Dimensions: 36 x 36 mm
Layout:
| Element | Function |
|---|---|
| Configuration button | A short press moves to the next channel in the current band (1 - 8). A long press of 2 seconds moves to the next band (A, B, E, F, R). A long press of 5 seconds moves to the next power level (25, 200, 400, 800, 1600 mW). A long press of over 10 seconds unlocks the channels that are disabled by default. |
| Chan LED (blue) | Shows the selected channel in the current band, from 1 to 8. |
| Band LED (green) | Shows the selected band among A, B, E, F and R. |
| Power LED (red) | Shows the selected power level among 25, 200, 400, 800 and 1600 mW. |
| MIC | Integrated microphone, transmits the sound together with the image. |
| MMCX connector | The radio frequency output. It is connected through the pigtail cable to a 5.8 GHz antenna. |
| 6-pin 1.0 mm connector | Power, video input and IRC signal, with pins +5V, GND, Video, GND, DCIN and IRC. |
| Mounting holes | Four M3 holes at 30.5 x 30.5 mm for fixing to the frame or to the stack. |
Pinout:
| Connector | Pin | Function |
|---|---|---|
| 6-pin 1.0 mm connector | +5V | 5 V output, maximum 1 A, for powering the camera |
| 6-pin 1.0 mm connector | GND | Ground, for the camera |
| 6-pin 1.0 mm connector | Video | Video signal input from the camera |
| 6-pin 1.0 mm connector | GND | Ground, for the battery |
| 6-pin 1.0 mm connector | DCIN | Power input 7 - 26 VDC |
| 6-pin 1.0 mm connector | IRC | Control signal from the flight controller for OSD adjustment |
| MMCX | - | 5.8 GHz radio frequency output to the antenna |
| Band | Letter | CH1 | CH2 | CH3 | CH4 | CH5 | CH6 | CH7 | CH8 |
|---|---|---|---|---|---|---|---|---|---|
| BOSCAM_A | A | 5865 | 5845 | 5825 | 5805 | 5785 | 5765 | 5745 | 5725 |
| BOSCAM_B | B | 5733 | 5752 | 5771 | 5790 | 5809 | 5828 | 5847 | 5866 |
| BOSCAM_E | E | 5705 | 5685 | 5665 | 5645 | 5885 | 5905 | 5925 | 5945 |
| FATSHARK | F | 5740 | 5760 | 5780 | 5800 | 5820 | 5840 | 5860 | 5880 |
| RACEBAND | R | 5658 | 5695 | 5732 | 5769 | 5806 | 5843 | 5880 | 5917 |
Frequencies are expressed in MHz.
Usage:
Connect the antenna before powering the VTX, because switching on without an antenna can damage the output stage. The MMCX - SMA cable included in the package is only a connecting cable, it is not an antenna, so a separate 5.8 GHz antenna with SMA connector is needed.
Connect the camera to the 6-pin connector: the VTX +5V to the camera power, GND to the camera ground and Video to the camera video output. Check each wire of the wiring against the markings on the board before soldering, because the colors may differ.
Connect the LiPo battery to the DCIN pin and to the second GND pin, respecting the polarity. Power with 7 - 26 V, that is from 2S to 6S, and at 6S make sure that the fully charged battery voltage stays below 26 V.
For OSD adjustment, connect the IRC pin to a free TX pin of the flight controller and configure the controller for the IRC protocol, using the frequency table of the VTX. If you do not need OSD, leave the IRC pin unconnected.
Adjust the band, channel and power from the button while the antenna is connected. Press briefly for channel, 2 seconds for band and 5 seconds for power, following the blue, green and red LEDs.
Set the goggles or the receiver to the same frequency as the VTX. At first power-up the frequency is 5733 MHz (B1). The camera image in the goggles shows that the adjustment worked.
The channels disabled by default are unlocked by holding the button pressed for more than 10 seconds. Use the frequencies permitted in the country where you fly.
On the bench use low power, for example 25 mW, and use the 1600 mW power only when there is airflow, for example in flight, because the board heats up.
For stable results, use short cables to the camera, keep the antenna away from wires and motors and fix the board to the frame through the M3 holes.
Details:


- Supply voltage
- 7-26 V DC
- Dimensions
- 36 x 36 mm
- Type
- Analog VTX 5.8 GHz
- Weight
- 7.3 g
- Output current
- 1 A
- Operating frequency
- 5645-5945 MHz
- Connector type
- MMCX
- Output power
- PIT / 25 / 200 / 400 / 800 / 1600 mW
- Number of channels
- 40
- Mounting hole diameter
- 30.5 x 30.5 mm, M3
Produs destinat utilizarii in proiecte electronice, automatizari, prototipare, educatie si cercetare.
Produsul trebuie utilizat numai conform specificatiilor tehnice mentionate in descriere si/sau in documentatia produsului.
Avertismente generale de siguranta:
Nu utilizati produsul la tensiuni, curenti sau temperaturi peste valorile specificate.
Montajul si conectarea trebuie realizate de persoane cu cunostinte tehnice minime in domeniul electric/electronic.
Evitati scurtcircuitele, inversarea polaritatii si conectarea gresita a alimentarii.
Nu lasati produsul alimentat nesupravegheat in timpul testelor.
Produsul nu este jucarie si nu este destinat copiilor.
Pentru modulele electronice, se recomanda utilizarea in carcase, panouri sau montaje protejate, dupa caz.
Identificare produs:
Denumirea produsului, codul/SKU-ul si caracteristicile tehnice sunt mentionate in pagina produsului si/sau pe eticheta ambalajului.
Producator / Importator / Distribuitor:
Sigmanortec S.R.L.
Calea Bucuresti nr. 9, Targu Jiu, Gorj, Romania
E-mail: [email protected]
Website: www.sigmanortec.ro
Persoana responsabila in UE:
Sigmanortec S.R.L.
Calea Bucuresti nr. 9, Targu Jiu, Gorj, Romania
E-mail: [email protected]
Documentatie si siguranta:
Pentru informatii suplimentare, fise tehnice, declaratii de conformitate sau instructiuni, ne puteti contacta la [email protected].
The tutorial uses the JHEMCU RuiBet Tran-3016W VTX as a standalone module, without a development board and without a program. After it receives power from a LiPo battery and a video signal from a camera, it transmits the image on 5.8 GHz to FPV goggles. It is adjusted with the button and the three LEDs on the board.
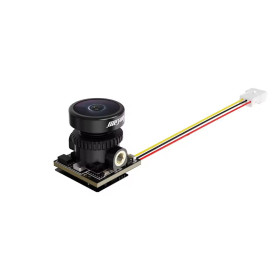
You use it in FPV drones, planes and other models that need real-time analog video, with adjustable power between 25 and 1600 mW. In this tutorial we connect it to an analog Caddx Ratel 2 camera, a 5.8 GHz antenna and a 3S 11.1 V battery, without an OSD from the flight controller.
How it works:
The camera sends the analog composite video signal on the Video pin. The VTX modulates it in frequency onto a 5.8 GHz carrier and sends it through the antenna. The goggles have a receiver tuned to the same frequency, demodulate the signal and display the image. If the frequencies differ, the image does not appear or is full of noise.
The frequency depends on the band and the channel. In the Raceband, channels are spaced 37 MHz apart, so the frequency of channel n is 5658 + 37 x (n - 1) MHz. For example R4 = 5658 + 37 x 3 = 5769 MHz. In the Fatshark band the spacing is 20 MHz, so F4 = 5740 + 20 x 3 = 5800 MHz. The default value 5733 MHz is channel 1 of band B.
Power is expressed in mW or dBm, according to the formula dBm = 10 x log10(P in mW). The board levels correspond approximately to 14 dBm for 25 mW, 23 dBm for 200 mW, 26 dBm for 400 mW, 29 dBm for 800 mW and 32 dBm for 1600 mW. Each doubling of the power means 3 dB more, and part of the electrical energy turns into heat, which is why the board heats up more at 1600 mW.
Power enters on the DCIN pin at 7 - 26 V, and the board produces a 5 V output of at most 1 A on the +5V pin, which powers the camera. A 3S battery has a nominal 11.1 V and 12.6 V when fully charged, so it is within the accepted range.
Connection:
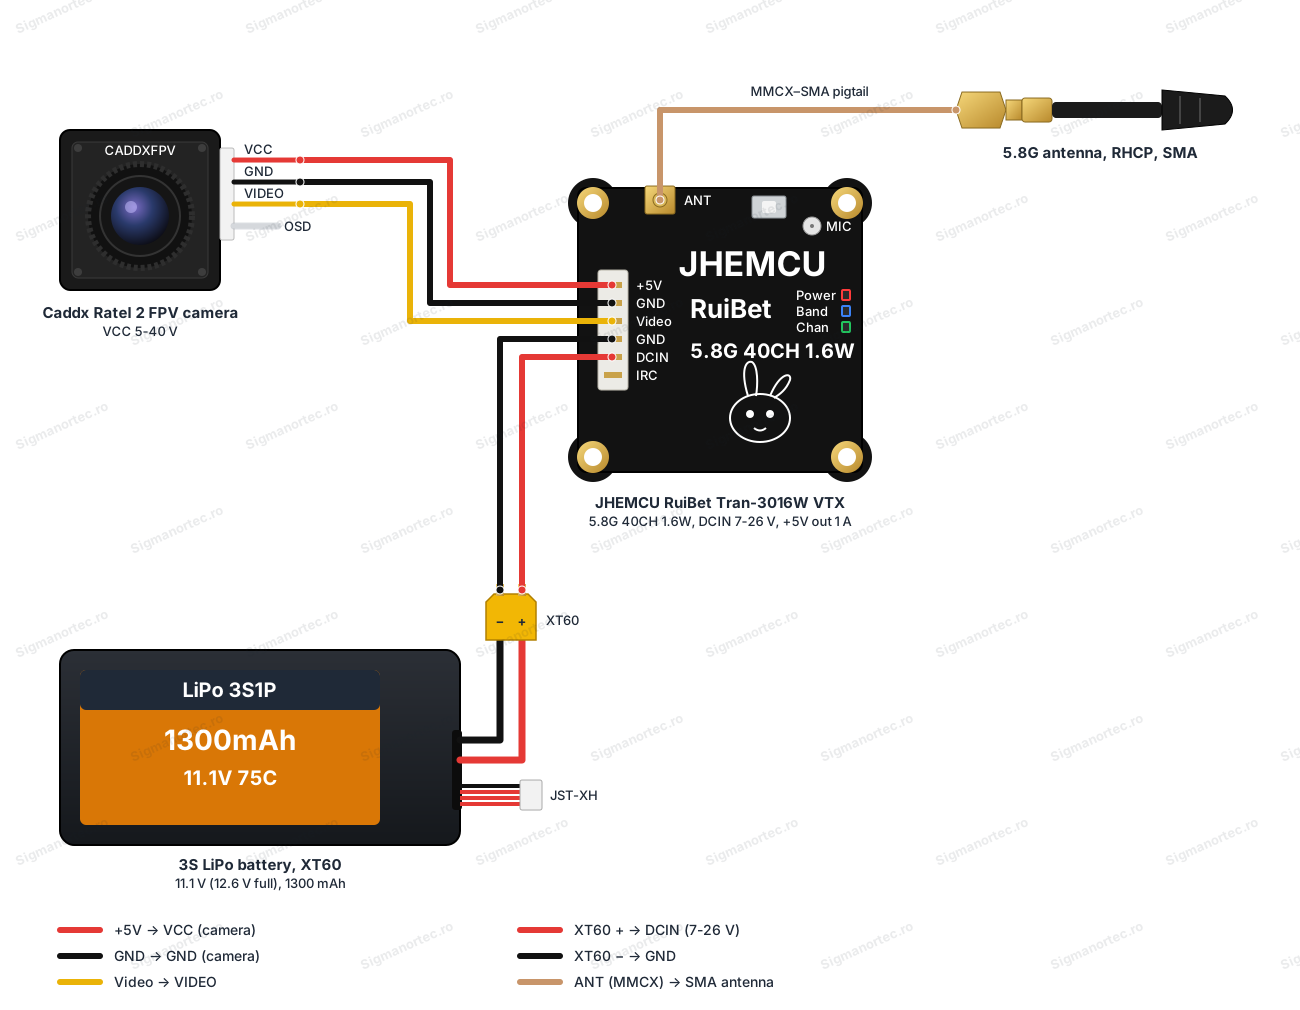
Before applying any power, connect the antenna to the VTX through the MMCX - SMA cable, because powering it without an antenna can destroy the VTX. The cable in the package is not an antenna, so mount a 5.8 GHz antenna on the SMA connector, for example an RHCP antenna. The camera is powered from the +5V pin of the VTX, so it does not need another source. Check each wire of the 6-pin cable according to the markings on the board, because the wire colors may differ. On the Caddx Ratel 2 camera, the red wire is VCC, the black wire is GND and the yellow wire is VIDEO, and the OSD wire is not used.
| Product pin | Connects to | Role |
|---|---|---|
| +5V | Camera VCC (red) | 5 V power for the camera, maximum 1 A |
| GND (first) | Camera GND (black) | Camera ground |
| Video | Camera VIDEO (yellow) | Analog video signal from the camera |
| DCIN | 3S battery, plus (XT60) | Power supply 7 - 26 V |
| GND (second) | 3S battery, minus (XT60) | Power ground |
| IRC | Not connected | OSD control, not used in this setup |
| MMCX connector | MMCX - SMA cable and 5.8 GHz antenna | Radio frequency output |
Buttons, settings and indicators:
| Element | What it does | How to use it |
|---|---|---|
| Button | Changes the channel, band and power and unlocks the channels disabled by default | Short press for channel, 2-second press for band, 5-second press for power, press longer than 10 seconds to unlock the channels |
| Chan LED (blue) | Shows the current channel, from 1 to 8 | Watch it after each short press |
| Band LED (green) | Shows the current band among A, B, E, F and R | Watch it after each 2-second press |
| Power LED (red) | Shows the power level among 25, 200, 400, 800 and 1600 mW | Watch it after each 5-second press |
| MIC | Built-in microphone for sound | It has no adjustment and needs no action |
Changing the channel: press the button briefly. Each press moves to the next channel in the current band, from 1 to 8, and the blue Chan LED shows the selected channel.
Changing the band: hold the button pressed for about 2 seconds and release it. The band moves to the next one in the order A, B, E, F, R, and the green Band LED shows the selected band.
Changing the power: hold the button pressed for about 5 seconds and release it. The power moves to the next level in the order 25, 200, 400, 800, 1600 mW, and the red Power LED shows the selected level.
Unlocking the channels: hold the button pressed for more than 10 seconds. This activates the channels that do not transmit by default, for example 5705, 5685 and 5665 MHz. Use them only where local regulations allow it.
After any adjustment, check the result in the goggles, where the camera image must appear clean on the chosen frequency.
Setup:
Power on with the antenna connected. At the first power-up the VTX transmits on 5733 MHz (B1) at 1.6 W. For bench work, first change the power to 25 mW and only then the other settings.
| Parameter | Values | How to change it |
|---|---|---|
| Channel | 1 - 8 | Short press, blue LED |
| Band | A, B, E, F, R | 2-second press, green LED |
| Power | 25, 200, 400, 800, 1600 mW | 5-second press, red LED |
| Unlocked channels | All 40 | Press longer than 10 seconds |
Step 1: after power-on, switch to the minimum power of 25 mW by holding the button pressed for 5 seconds and repeating until the red LED shows the 25 mW level.
Step 2: choose the band with 2-second presses, until the green LED shows the desired band.
Step 3: choose the channel with short presses, until the blue LED shows the desired channel.
Step 4: tune the goggles to the same frequency, using the frequency table, and check the image. After restarting the VTX, check the LEDs and the image again, to see which values it has kept.
Usage example:
The goal of the example is a freestyle drone with a 3S battery, a Caddx Ratel 2 camera and analog FPV goggles tuned to Fatshark F4 (5800 MHz).
Mount the VTX on the frame with four M3 screws at 30.5 x 30.5 mm. Connect the camera to the +5V, GND and Video pins, then the battery to DCIN and the second GND, with the 5.8 GHz antenna already mounted on the MMCX - SMA cable.
Power up the VTX, set the power to 25 mW for the bench tests, then choose band F with 2-second presses and channel 4 with short presses. Tune the goggles to 5800 MHz and check the camera image.
Before flying, raise the power to 800 mW or 1600 mW with 5-second presses, without leaving the drone on the bench at high power. In flight the airflow cools the board and the image must remain stable.
Common problems:
No image appears in the goggles. The most likely cause is a different frequency between the VTX and the goggles. Check the band and the channel on the VTX LEDs and on the goggles, then check the connection of the Video wire and the antenna.
The image is full of noise or is lost quickly. The cause may be a loosely connected antenna, a polarization different from that of the goggles, or mounting near wires and motors. Check the MMCX and SMA connectors and move the antenna away from noise sources.
The camera does not start. Check the +5V and GND wires of the camera, the polarity and whether the battery is connected to DCIN and the second GND, with a voltage between 7 and 26 V.
The VTX gets very hot on the bench. The cause is high power without airflow. Reduce the power to 25 mW and use 1600 mW only in flight or with a fan.
A desired channel does not transmit. Some channels are disabled by default. Hold the button pressed for more than 10 seconds to unlock them, if local regulations allow it.
The OSD adjustment does not work. In this setup the IRC pin is not connected. Connect IRC to a free TX of the flight controller and configure the IRC protocol with the frequency table of the VTX.
Limitations and tips:
The VTX transmits only analog video on 5.8 GHz and needs goggles or an analog receiver. The 5 V output supports at most 1 A, so do not connect large consumers to it other than the camera. At 6S a fully charged battery has 25.2 V, close to the 26 V limit of the input, so power it with care.
Never power the VTX without an antenna connected. At high power use a suitable antenna and ensure cooling. Respect the local regulations regarding frequencies and transmission power.
In the next project you can connect the IRC pin to the flight controller to change the channel and power from the OSD menu, without touching the button on the board.