
Product images are for informational purposes only and may vary slightly depending on the batch and supplier. Product specifications and prices may be subject to change without notice. We do our best to provide accurate and complete product specifications, but they may not be completely accurate. If you encounter any such situation, please let us know.
The product is intended for specialists and requires qualified and authorized personnel. The product does not include assembly/use instructions . Putting the product into operation by unqualified persons leads to the loss of the warranty according to the Terms and Conditions on the site.
The specified technical parameters (current, power, etc.) represent maximum allowable values under ideal operating conditions. For safe use and optimal lifespan, it is recommended to operate the product continuously at no more than 50% of the specified maximum values.
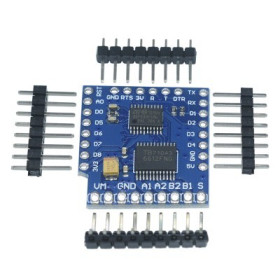
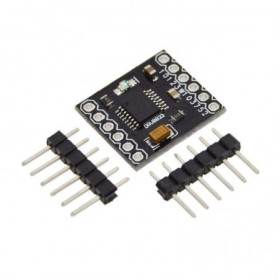
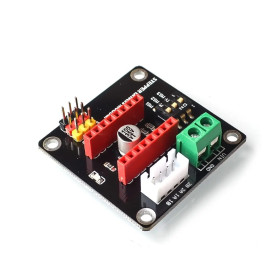
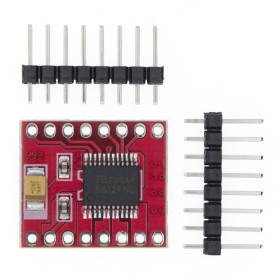
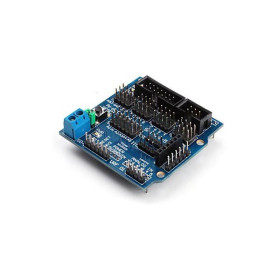
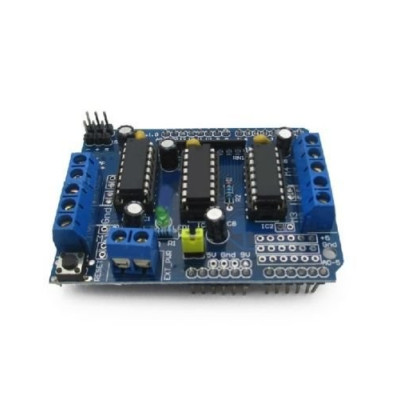
Shield Motor Control Module, L293D, 5-12V
The L293D shield for Arduino simplifies motor control in robotics projects, providing control for up to 4 bidirectional DC motors or 2 stepper motors and 2 servo motors. It operates at 5-12V, delivers up to 1.2A, separates logic from power for stability, has a 74HC595 register for pin expansion, and screw terminals for quick connection.
Shipping by Thursday 22 October
Buying this product earns you Ft59.63 in loyalty points.

International fast shipping within EU. Free Shipping for orders above 100 EUR in most EU countries.

We ship from our stock within 24H

You earn points with every order, worth 5%.
The L293D motor control shield is an extension board compatible with Arduino UNO and Arduino Mega, designed to simplify motor control in robotics projects, automation systems, and remote-controlled vehicles. The module allows the Arduino board to control up to 4 bidirectional DC motors with 8-bit speed control, 2 stepper motors, or 2 servo motors, taking over the current and power that the microcontroller cannot supply directly.
The shield uses two L293D integrated circuits of the dual H-bridge type, which isolate the control logic section from the motor power section, and a 74HC595 shift register that expands the Arduino board’s GPIO pins to control the direction of the 8 outputs of the drivers.
Power can be supplied together with the Arduino board, via USB or the DC jack, or separately through the 2-pin EXT-PWR connection block, a recommended solution when the motors draw significant current. The motors are connected through screw terminals labeled M1, M2, M3 and M4, while the servo motors connect to the 3-pin headers in the upper-left corner of the board. A Reset button is accessible on the top of the shield and replicates the function of the Arduino board’s reset button.
Programming is done with the AFMotor library (available in the Download section) for DC and stepper motors and with the Servo library for servo motors, allowing quick integration into any Arduino-based project.
IMPORTANT!
This shield is the V1 generation and uses Adafruit Motor Shield library version 1.x, which contains the header file AFMotor.h. The library is not included by default in the Arduino IDE and must be installed separately. Download the ZIP archive from GitHub, from adafruit/Adafruit-Motor-Shield-library, and add it via Sketch - Include Library - Add .ZIP Library. Library version V2 is NOT compatible with this shield, as it is intended for the I2C communication version. The correct library is available in the Download section.
WARNING! The board has a jumper called VIN Jumper. If external power is used on the EXT-PWR block, this jumper MUST BE REMOVED. The jumper should be installed ONLY if the motors are powered from the voltage taken from the Arduino board.
WARNING! The EXT-PWR terminals do not have reverse-polarity protection diodes. Reversing the external supply may destroy the shield and the Arduino board connected to it.
Specifications:
Supply voltage: 12VDC max
Maximum output current: 1.2A per channel
DC motor voltage: 4.5V - 25V
Motor control: 4 bidirectional DC motors, 2 stepper motors or 2 servo motors
Speed control: 8-bit PWM
Driver circuits: L293D x2
Shift register: 74HC595
Motor output terminals: M1, M2, M3, M4 screw terminal blocks
Servo terminals: 3-pin headers
External power: 2-pin EXT-PWR block
Button: Reset
Compatibility: Arduino UNO, Arduino Mega and boards with the same pin layout
Libraries: Adafruit Motor Shield library V1 (AFMotor.h), Servo
Usage:
Mount the L293D shield on the Arduino UNO or Mega board, making sure all pins are correctly aligned before pressing it down.
Choose the power mode. For shared power, leave the VIN jumper installed and power the Arduino board via USB or the DC jack. For separate power, remove the VIN jumper and connect the external supply to the EXT-PWR block.
Check the polarity of the external supply before connecting, since the EXT-PWR block has no reverse-polarity protection.
Connect the DC motors to terminals M1, M2, M3 and M4, one motor on each pair of contacts.
For bipolar stepper motors, connect the first coil to M1 and the second coil to M2, respectively M3 and M4 for the second motor. For unipolar motors, also use the GND contact between the terminal blocks.
For servo motors, connect the cables to the 3-pin headers in the upper-left corner, respecting the GND, VCC and signal order.
Install Adafruit Motor Shield library version 1.x. Download the ZIP archive from GitHub, from adafruit/Adafruit-Motor-Shield-library, and add it via Sketch - Include Library - Add .ZIP Library. The Servo library is already included in the Arduino IDE.
Upload the appropriate test code for the type of motor used and check the direction of rotation.
Power up the system and start the application, keeping the voltage below 12V if you are using shared power with the Arduino board.
Power Options:
Shared power with Arduino via USB or the DC jack.
Separate power via the 2-pin EXT-PWR block.
Output Terminals:
5-pin screw terminals labeled M1, M2, M3 and M4 for connecting DC motors or stepper motors.
3-pin headers for servo motors.
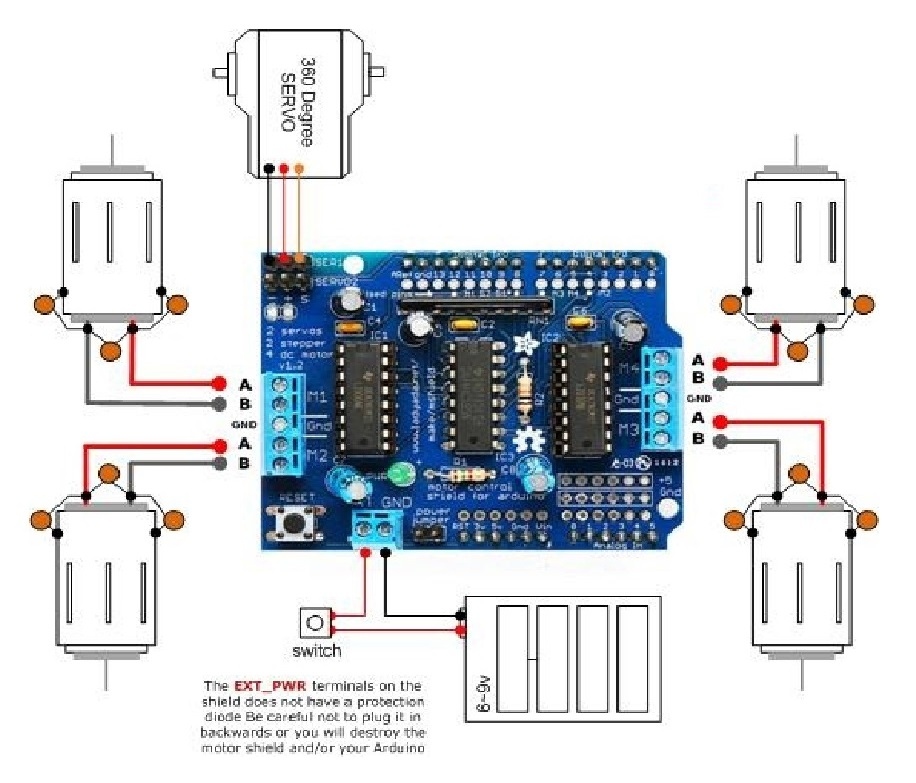
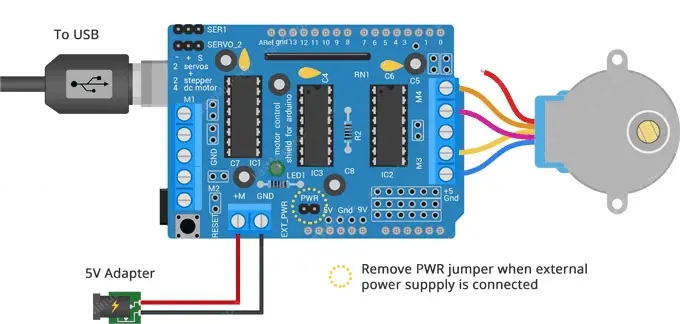
Pinout:
| Arduino Pin | Function |
|---|---|
| D3 | PWM Motor M2 |
| D5 | PWM Motor M3 |
| D6 | PWM Motor M4 |
| D11 | PWM Motor M1 |
| D4 | 74HC595 - DIR_CLK |
| D7 | 74HC595 - DIR_EN |
| D8 | 74HC595 - DIR_SER |
| D12 | 74HC595 - DIR_LATCH |
| D9 | Servo 2 |
| D10 | Servo 1 |
| D2, D13 | Free |
| A0 - A5 | Free |
If you are using a shared power supply, connect the Arduino through the USB port or the DC jack and place the power jumper on the shield.
If you are using separate power supplies, connect the shield power to the 2-pin EXT-PWR block and power the Arduino separately through the USB port or the DC jack. Make sure the power jumper is removed from the shield.
Incorrect power polarity will destroy the board!

Motor Connection:
DC Motors: Connect the DC motors to terminals M1, M2, M3 and M4. Motors with voltages between 4.5V and 25V can be connected to these terminals.
Stepper Motors: Connect the stepper motors to ports M1-M2 and M3-M4. Use the GND terminals to connect unipolar motors.

Servo Motors: Connect the servo motors to the 3-pin headers in the upper-left corner of the shield.

Notes:
Make sure the supply voltage does not exceed 12V if you are using a shared power supply.
Use the AFMotor library to control DC and stepper motors, and the Servo library to control servo motors.
Check the connections and settings before powering up the project to avoid power and operating issues.
- Supply Voltage
- 5
- Maximum Input Voltage
- 12
- Input Voltage Type
- “DC” in Romanian can mean **“de ce”**, which translates to **“why”** in English.
Produs destinat utilizarii in proiecte electronice, automatizari, prototipare, educatie si cercetare.
Produsul trebuie utilizat numai conform specificatiilor tehnice mentionate in descriere si/sau in documentatia produsului.
Avertismente generale de siguranta:
Nu utilizati produsul la tensiuni, curenti sau temperaturi peste valorile specificate.
Montajul si conectarea trebuie realizate de persoane cu cunostinte tehnice minime in domeniul electric/electronic.
Evitati scurtcircuitele, inversarea polaritatii si conectarea gresita a alimentarii.
Nu lasati produsul alimentat nesupravegheat in timpul testelor.
Produsul nu este jucarie si nu este destinat copiilor.
Pentru modulele electronice, se recomanda utilizarea in carcase, panouri sau montaje protejate, dupa caz.
Identificare produs:
Denumirea produsului, codul/SKU-ul si caracteristicile tehnice sunt mentionate in pagina produsului si/sau pe eticheta ambalajului.
Producator / Importator / Distribuitor:
Sigmanortec S.R.L.
Calea Bucuresti nr. 9, Targu Jiu, Gorj, Romania
E-mail: [email protected]
Website: www.sigmanortec.ro
Persoana responsabila in UE:
Sigmanortec S.R.L.
Calea Bucuresti nr. 9, Targu Jiu, Gorj, Romania
E-mail: [email protected]
Documentatie si siguranta:
Pentru informatii suplimentare, fise tehnice, declaratii de conformitate sau instructiuni, ne puteti contacta la [email protected].
Reviews (4) - Review moderation

Și eu m-am chinuit pana i-am dat de cap Ideea e ca trebuie folosita librăria care este menționată și în descriere altfel nu o sa meargă, si vei înjura toți dracii crezând ca ți-ai luat țeapă
Ok
asi face treaba bine!
ok
#include <AFMotor.h>
// Motors connected to terminals M1, M2, M3 and M4
AF_DCMotor motor1(1, MOTOR12_64KHZ);
AF_DCMotor motor2(2, MOTOR12_64KHZ);
AF_DCMotor motor3(3, MOTOR34_64KHZ);
AF_DCMotor motor4(4, MOTOR34_64KHZ);
void setSpeedAll(uint8_t speed) {
motor1.setSpeed(speed);
motor2.setSpeed(speed);
motor3.setSpeed(speed);
motor4.setSpeed(speed);
}
void runAll(uint8_t direction) {
motor1.run(direction);
motor2.run(direction);
motor3.run(direction);
motor4.run(direction);
}
void setup() {
Serial.begin(9600);
Serial.println("4 motor test");
setSpeedAll(200);
runAll(RELEASE);
}
void loop() {
// all motors forward, speed ramp up and down
Serial.println("Forward");
runAll(FORWARD);
for (int i = 0; i < 255; i++) {
setSpeedAll(i);
delay(10);
}
for (int i = 255; i > 0; i--) {
setSpeedAll(i);
delay(10);
}
// all motors backward, speed ramp up and down
Serial.println("Backward");
runAll(BACKWARD);
for (int i = 0; i < 255; i++) {
setSpeedAll(i);
delay(10);
}
for (int i = 255; i > 0; i--) {
setSpeedAll(i);
delay(10);
}
// stop all motors
Serial.println("Stop");
runAll(RELEASE);
delay(1000);
}