

Product images are for informational purposes only and may vary slightly depending on the batch and supplier. Product specifications and prices may be subject to change without notice. We do our best to provide accurate and complete product specifications, but they may not be completely accurate. If you encounter any such situation, please let us know.
The product is intended for specialists and requires qualified and authorized personnel. The product does not include assembly/use instructions . Putting the product into operation by unqualified persons leads to the loss of the warranty according to the Terms and Conditions on the site.
The specified technical parameters (current, power, etc.) represent maximum allowable values under ideal operating conditions. For safe use and optimal lifespan, it is recommended to operate the product continuously at no more than 50% of the specified maximum values.
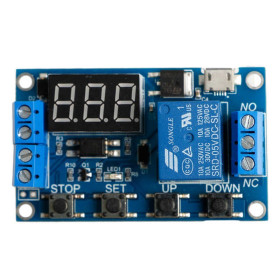
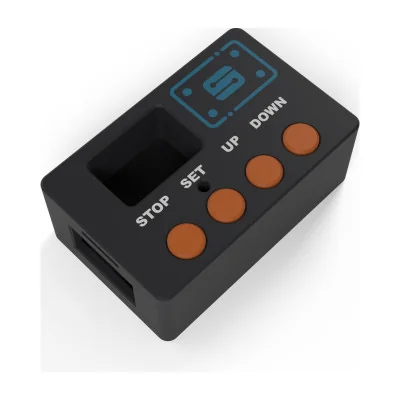
Housing for the HCW-M421, XY-LJ02 module, snap-on without screws, with 4 buttons
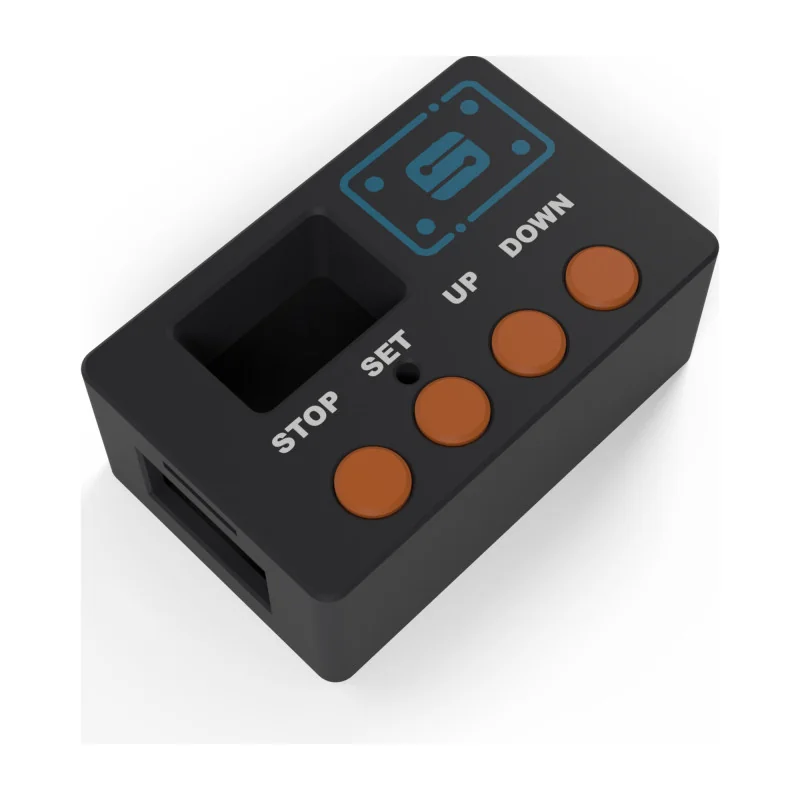
3D-printed enclosure, snap-fit without screws, specially designed for the HCW-M421 / XY-LJ02 timer relay module, with four dedicated 9 mm buttons for STOP, SET, UP, and DOWN, a tapered window for the display, a hole for the status LED, and cutouts for both terminal blocks and the micro-USB connector, ideal for panel mounting or use on a workbench without looking like a prototype.
Buying this product earns you 1.22 RON in loyalty points.

International fast shipping within EU. Free Shipping for orders above 100 EUR in most EU countries.

We ship from our stock within 24H

You earn points with every order, worth 5%.
The enclosure is a 3D-printed mechanical part, specially designed for the HCW-M421 timer relay module, also known as XY-LJ02, which normally reaches the buyer as a bare board, with exposed terminals, small hard-to-press buttons, and an unprotected display. Mounted over the board, the enclosure turns the module into a finished device that can be placed on a table, mounted in an electrical panel, or handed on to a customer without looking like a prototype.
The assembly is done without any screws and without any metal inserts. The module board sits on four bosses with centering pins in the base, and four columns in the lid press on it and hold it firmly in place. The lid is pushed in by hand and is retained by six clips hidden inside the walls, so that on the outside no joint is visible other than the fine line between base and lid. The walls are 2.5 mm thick, sufficient for a rigid clip fit and for protecting the board inside.
Among the main features are four dedicated 9 mm buttons, aligned over the module tact switches and marked STOP, SET, UP and DOWN, which remain captive in the lid and do not fall out when the enclosure is turned over, a funnel-shaped window for the display that keeps the digits visible while hiding the board behind, a 3 mm hole for the status LED, embossed terminal labels on the bottom of the enclosure (6-30V, GND, TRIGGER, GND-T for the 4-pole block and NO, COM, NC for the 3-pole block), and cutouts for both screw terminal blocks and for the micro-USB connector. Through these cutouts, both power supply options of the housed module remain accessible, either through the terminal block at 6 - 30 VDC or through the micro-USB connector at 5 VDC, without needing to remove the board from the enclosure to change the power source.
Specifications:
Compatibility: HCW-M421 / XY-LJ02 timer relay module, 38 x 63 mm board, mounting holes at 31.8 x 57.2 mm pitch
Overall dimensions: 45 x 70 x 26.5 mm
Weight: approx. 40 g
Material: PLA, 3D printed, 2.5 mm walls
Components: base, lid and 4 buttons
Lid attachment: 6 internal clips, no screws
Board mounting: 4 bosses with centering pins and 4 pressing columns in the lid
Cutouts: 4-pole terminal block, 3-pole terminal block, micro-USB, display window, 4 buttons, status LED
Markings: button labels and logo on the lid, terminal legend on the bottom of the enclosure
Use:
Push the 4 buttons into the lid from the outside until you hear the retaining clip click; the buttons remain captive but slide freely in the pressing direction.
Place the HCW-M421 / XY-LJ02 module board in the base, with the display facing the window; the centering pins of the bosses fit into the board mounting holes and hold it in position.
Check that the 4-pole terminal block, the 3-pole terminal block and the micro-USB connector align exactly with the cutouts in the base wall.
Press the lid evenly along the full length of the board until the six internal clips fully engage and the lid no longer has play.
To disassemble, insert a wide screwdriver into the gripping slot in the base frame and gently lift one end of the lid, then continue along the length until the clips release.
Power the module either through the 4-pole terminal block at 6 - 30 VDC or through the micro-USB connector at 5 VDC, both directly accessible through the enclosure cutouts, without removing the lid.
Connect the load to the 3-pole terminal block, on the NO, COM and NC relay contacts, depending on the desired operating mode.
If the load controlled by the relay operates at dangerous voltages, for example 220 VAC, wiring to the terminal block must be carried out only by a qualified person, with the equipment disconnected from the mains, and the enclosure must be installed in a suitable electrical panel.
The enclosure is a 3D-printed PLA part, functional but not sealed; fine layer lines specific to 3D printing may be visible on the surfaces, therefore installation outdoors or in humid environments is not recommended.
- Compatibility
- HCW-M421
- Mounting method
- Clipsare fara suruburi
Produs destinat utilizarii in proiecte electronice, automatizari, prototipare, educatie si cercetare.
Produsul trebuie utilizat numai conform specificatiilor tehnice mentionate in descriere si/sau in documentatia produsului.
Avertismente generale de siguranta:
Nu utilizati produsul la tensiuni, curenti sau temperaturi peste valorile specificate.
Montajul si conectarea trebuie realizate de persoane cu cunostinte tehnice minime in domeniul electric/electronic.
Evitati scurtcircuitele, inversarea polaritatii si conectarea gresita a alimentarii.
Nu lasati produsul alimentat nesupravegheat in timpul testelor.
Produsul nu este jucarie si nu este destinat copiilor.
Pentru modulele electronice, se recomanda utilizarea in carcase, panouri sau montaje protejate, dupa caz.
Identificare produs:
Denumirea produsului, codul/SKU-ul si caracteristicile tehnice sunt mentionate in pagina produsului si/sau pe eticheta ambalajului.
Producator / Importator / Distribuitor:
Sigmanortec S.R.L.
Calea Bucuresti nr. 9, Targu Jiu, Gorj, Romania
E-mail: [email protected]
Website: www.sigmanortec.ro
Persoana responsabila in UE:
Sigmanortec S.R.L.
Calea Bucuresti nr. 9, Targu Jiu, Gorj, Romania
E-mail: [email protected]
Documentatie si siguranta:
Pentru informatii suplimentare, fise tehnice, declaratii de conformitate sau instructiuni, ne puteti contacta la [email protected].
This enclosure is a 3D printed mechanical part, made specifically for the HCW-M421 timer relay module, also known as XY-LJ02. Its purpose is to protect the board and turn the module into a ready-to-use device, with real buttons, a protected display and access to all terminals, suitable for mounting in an electrical panel, on a workbench or in a project you hand over to someone else.
How it works:
The enclosure has two main parts, the base and the cover, plus four buttons mounted separately. The base has four bosses with a centering pin that fit exactly into the mounting holes of the module board, spaced at 31.8 x 57.2 mm, so the board cannot slide sideways once placed in position. The cover has four columns that press the board from above, and on its walls there are six clips that snap into the base when you press the cover evenly, with no screws needed at all. The 9 mm buttons are pushed in from the outside into the holes of the cover and stay captive, but slide freely, so that when you press them they transmit the pressure directly onto the STOP, SET, UP and DOWN tactiles of the module. The window in front of the display has a funnel shape that narrows toward the inside, which keeps the digits visible from the outside while hiding the rest of the components on the board.
What you need:
- 1 x Enclosure for HCW-M421 module, snap-fit without screws
- 1 x HCW-M421 / XY-LJ02 timer relay module
- 1 x Flat screwdriver for disassembly
Common issues:
The buttons don't touch the module's tactiles and seem unresponsive to pressing: check whether the board is pushed all the way onto the centering bosses and whether it is the HCW-M421 / XY-LJ02 model with the 38 x 63 mm size, because a board from a different revision may have the tactiles shifted relative to the enclosure's cutouts.
The cover doesn't go on fully or stays loose: make sure you press evenly along the entire length of the cover, not just at one end, otherwise some clips stay unlatched while the others force the plastic.
You can't get the cover off without forcing the enclosure: use the prying slot in the base's frame together with a flat screwdriver, inserted carefully, and lift gradually along the joint instead of pulling from a single point.
The display looks blurry or only partially visible through the window: check that the board sits straight on the bosses, because a slight tilt of the board shifts the display away from the center of the funnel-shaped window.
The micro-USB port isn't visible through the cutout or the cable doesn't go in easily: check the board's orientation during assembly, the micro-USB port and the two terminal blocks must each line up with their corresponding cutout before you press the cover on.
Limitations and tips:
The enclosure is designed exclusively for the HCW-M421 / XY-LJ02 module board with the 38 x 63 mm size and mounting holes spaced at 31.8 x 57.2 mm, other modules or other board revisions may not fit the cutouts or the bosses.
Being a 3D printed PLA part, the enclosure is not sealed and is not intended for outdoor mounting or for environments with high humidity, and at high temperatures the material can deform easily.
The snap-fit clips are designed for occasional assembly and disassembly, not for very frequent opening and closing, and forcing them with sharp tools can break them.
For relay loads at dangerous voltages, wire the connections only with the equipment disconnected from the mains, preferably done by a qualified person, and keep the enclosure in an electrical panel appropriate for the protection required by the installation.